
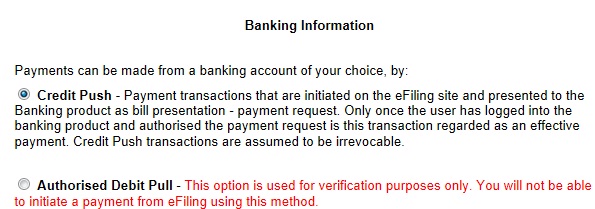
With a credit push, the payment is performed by you, the bank account holder. When making a payment to SARS, eFiling will send a payment request to your bank which will indicate, the amount that needs to be paid and gives a payment reference number. The taxpayer then physically login to his bank product and authorises this request which acts as an instruction to the bank to make the payment to SARS.
Credit Push payments are considered to be irrevocable and can not be recalled or reversed.
To see how to set up once-off credit push bank details, follow these easy steps:
The steps to take
Before you can use a credit push, you must first make sure that you can access the specific product at your bank.
Top Tip: Talk to your bank about accessing an account which supports credit push.
Login to eFiling and click on:
For individuals, click on ‘Home’:

Followed by ‘User’ on the left side:
![]()
Or for organisation or tax practitioner, click on ‘Organisations’ at the top:

Followed by ‘Organisations’ on the left:
For Banking Details, click ‘Banking Details’: ![]()
Should you need to set up a new account, click:
Or should you need to update your banking details to a Credit Push, click Open:

Select Credit Push:
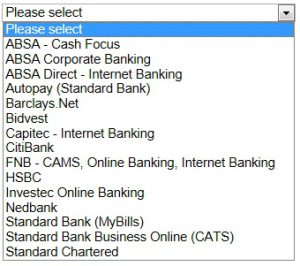
Scroll down to the bottom, enter the account name and click on the drop down arrow next to Credit Push:

A list of the relevant bank accounts will be shown, e.g.:
Top Tips:
- A Credit Push only needs to be set up once.
- The current process to finalise a payment on eFiling must still be followed.
- The only difference now is, once the payment has been processed on eFiling you will need to log onto your banking product and authorise the transaction.
Once you have set up your banking details on eFiling you can now start processing payments.
You can do this by:
- Clicking on:
which appears after you have filed a return/declaration or got an assessment that shows you must pay.
Select ‘Pay Now’ to proceed:
Click ‘OK’:
Top Tip: Where you selected ‘Cancel’, the payment will now be under ‘Payments – General Unpaid.’:
OR
Navigate to Payment: ‘Additional Payment – Create Additional Payment’in the left hand menu under ‘Returns’:
Select the tax type you wish to pay, and complete the details, as needed.
Click ‘Make Payment’ to proceed or ‘Save Payment’ to come back at a later stage and complete the payment.
Click ‘OK’ to continue or to save the payment.
Top Tip: Where you selected ‘Save Payment’, the payment will now be under ‘Payments – General Unpaid’.
OR
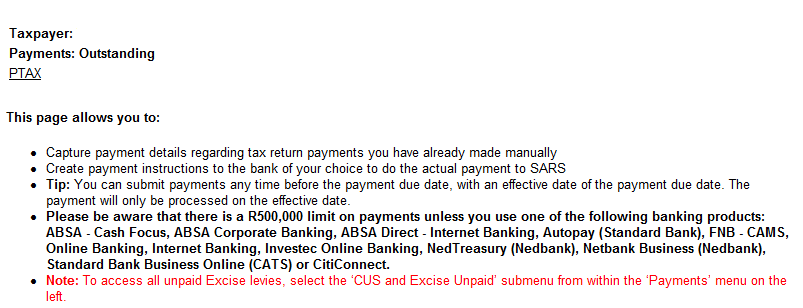
Navigate to ‘Payments – General Unpaid’ in the left hand menu under ‘Returns’.
A list of outstanding payments will appear.
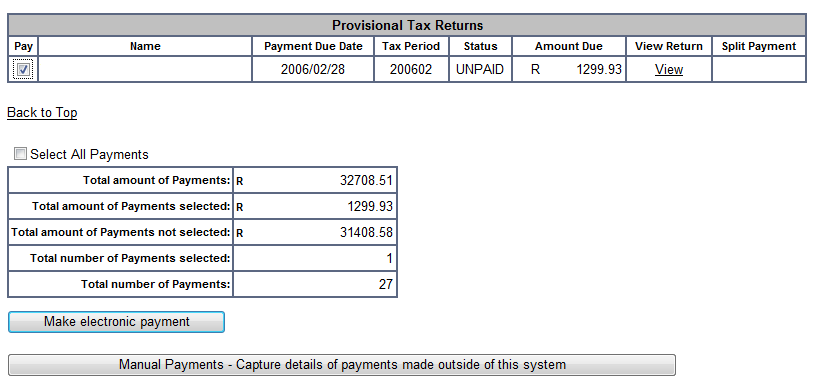
Select the payment(s) you want to process
Click ‘Make electronic payment’.
Top Tip: If you select ‘Manual Payments’ this means you will not processing a payment through eFiling but will use a different channel, e.g. EFT (Electronic Funds Transfer), etc.
You will be directed to the Payments Details page, where you will have the option of selecting the account from which you would like to make payment and the ‘Payment Request date’, i.e. when the payment should be authorised or processed against the selected account, once authorised by you on your online banking. A payment instruction cannot be approved on the bank’s side after the date selected on eFiling.

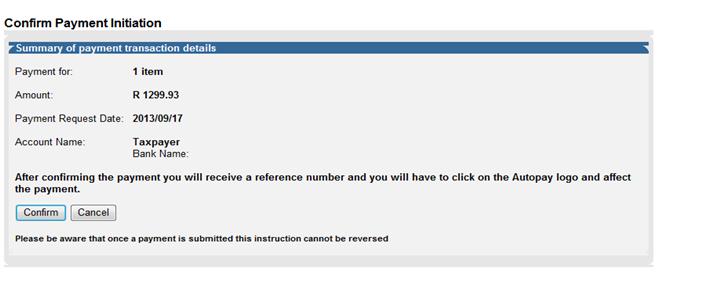
The ‘Confirm Payment Initiation’ page will be displayed. Please confirm the details you have captured are correct. Click ‘Confirm’ to continue. Selecting ‘Cancel’ will cancel the transaction.
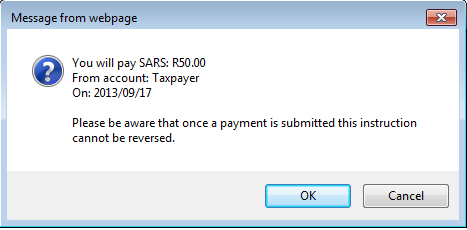
Your payment details will appear, click ‘OK’ to continue.
The ‘Payment Initiation Result’page will be displayed, which provides a summary of the payment transaction and tells you, your payment request has been successfully submitted to your bank for authorisation.
An error message in red will appear should your bank rejected the payment instruction, together with the reason why it was rejected by the bank.
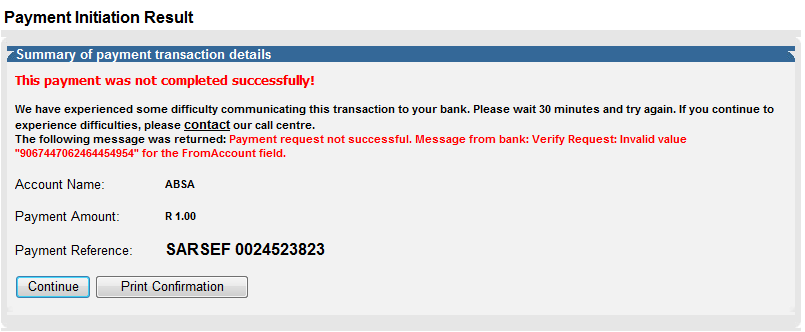
Click ‘Print Confirmation’, to print a copy of the transaction details for your records.
Click ‘Print’:

Click ‘Continue’ to proceed.
The ‘Payment History’ page will be displayed. The credit push payment status will be indicated as ‘Awaiting Authorisation’. Once you have approved it from the bank side, the status will indicate ‘Successful’ which is used as your proof of payment.

You will now be required to logon to your banking profile, to authorise the payment to SARS, or cancel the transaction, if necessary.
Once you have processed your payment on SARS eFiling, you need to authorise the payment to be released to SARS. Select your banking product from the menu for information about the steps you need to follow.
- ABSA
- Bidvest Bank
- Capitec
- CitiBank
- First National Bank (FNB)
- HSBC Bank
- Investec
- Nedbank
- Standard Bank MyBills
- Standard Bank Business Online Banking
- Standard Chartered Bank
- Mercantile Bank
- Albaraka Bank
- HBZ Bank LTD
- SASFIN Bank
Top tip: You need to familiarise you with your banks cut of time for processing payment to avoided penalties and interest be charge.
Top Tip: A Credit Push transaction can only be cancelled before it is authorised on the banking profile.
To cancel a Credit Push transaction click ‘Payments’ and then ‘History’:

The list of payments will appear.
Click ‘Open; to see the details of the transaction.
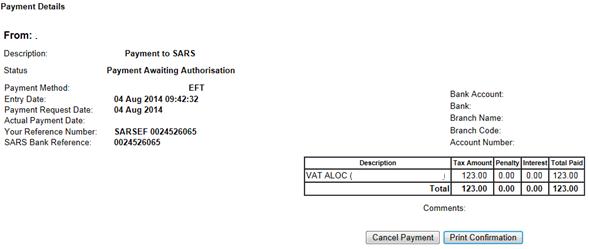
Click ‘Cancel Payment’.
A message will be shown. Click ‘OK’, to confirm the transaction must be cancelled.

Top Tip: A transaction can’t be cancelled within 5 minutes of creating the Credit Push.

The status of the transaction will change to ‘cancelled’ and the transaction will be reversed.

Please note: Where the transaction has already been sent, authorised and processed, and the transaction was cancelled afterwards, the status will update to Successful.

For the latest payments option click here.